1. Taking Initial Precautions and Isolating the Roomba
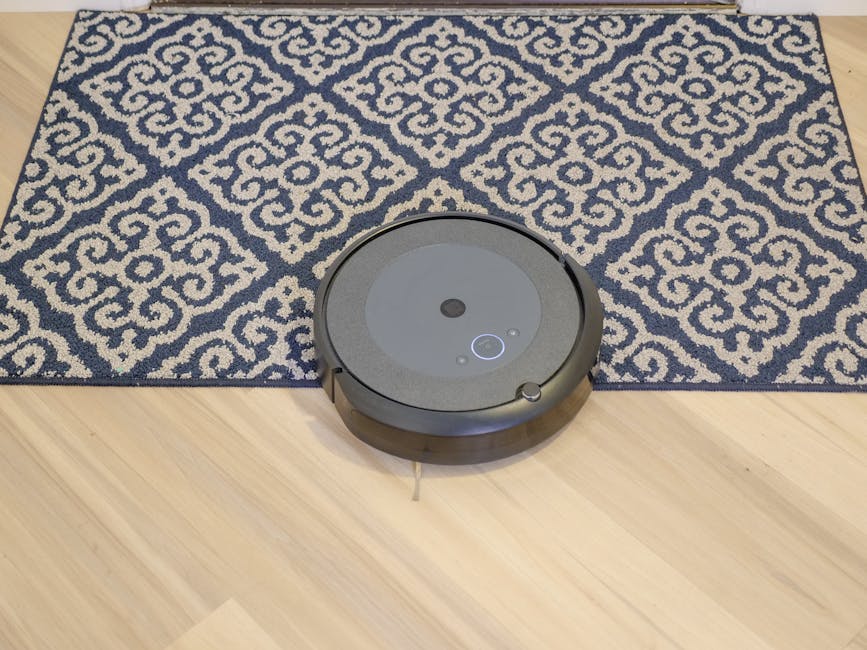
In the unfortunate event that your Roomba runs over pet poop, don’t panic! First and foremost, disconnect the Roomba from Wi-Fi and its charging station immediately to prevent further spreading of mess. Don protective gloves for safe hygiene during the cleaning process.
Prepare a cleaning station using plastic bags or any other waterproof material. If the mess is indoors, try to keep the room well-ventilated to minimize odors.
Let’s summarize the initial steps:
1. Disconnect the Roomba from Wi-Fi and power supply
2. Put on protective gloves
3. Prepare a plastic lined cleaning station
4. Ensure good ventilation
2. Disassembling the Roomba for Cleaning
Next, remove all removable parts from the Roomba. This typically includes the dustbin, the extractors, the front wheel, and the side brushes. If you’re unsure how to do this, consult your Roomba’s user manual for specific instructions.
Follow these steps for safe disassembly:
1. Remove the extractors
2. Take out the filter and dustbin
3. Detach the front wheel and side brushes
3. Deep Cleaning the Roomba Components
Once you’ve successfully taken apart your Roomba, it’s time for a thorough cleaning. Use hot soapy water, disinfectants, and specialized cleaning solutions for each different part. You may want to use a toothbrush to properly scrub all grooves and crevices, and a soft, dry cloth is perfect for gently wiping the sensors.
Here’s your cleaning tip rundown:
– Utilize different cleaning agents for an extensive cleanse
– Put a toothbrush to good use on those difficult spots
– Pay attention to the sensors – clean them gently to avoid damage
4. Properly Drying the Roomba and its Components
After the cleaning session, make sure to dry all the components thoroughly. Any residual moisture could potentially damage your Roomba, so it’s crucial to be cautious during this process!
Here are some pro tips for drying:
– Use a fan to speed up the drying process
– Pat sensitive parts with a dry, lint-free cloth
5. Reassembling the Roomba and Ensuring Proper Functioning
Once all parts are dry, it’s time to reassemble your Roomba. Consult the manual or online resources if you’re unsure where each part goes. Upon reassembly, connect your Roomba to the Wi-Fi and charging station, and ensure its operating as it should.
Checklist for successful reassembly:
1. Install the filter, dustbin, and front wheel
2. Attach side brushes and extractors
3. Reconnect your Roomba to the Wi-Fi and power source
However, this process may have some ‘Pros and Cons’:
– Pros: Tooltip: Ensures cleanliness and hygiene, thus extending Roomba’s lifespan.
– Cons: Tooltip: It’s a time-consuming process and there’s a risk of damage if not executed properly.
6. Final Checks and Post-Cleaning Care
Before turning your Roomba back on, perform a final check for residual waste or debris. Also consider ways to avoid such blunders in the future – like setting up Roomba virtual wall barriers or scheduling cleanups when your pets are securely confined.
To summarize the post-cleaning care:
- Use a flashlight to do a thorough check
- Make sure all sensors and brushes are completely clean and unobstructed
- Run the Roomba in a clean area to verify proper functionality
Can the Methods for Disposing of Dirty Grout Water Help in Cleaning a Roomba After a Poop Disaster?
When dealing with a mess from a Roomba after a poop disaster, understanding safe grout water disposal can be surprisingly helpful. While traditionally used for tile cleaning, these methods ensure that dirty water is handled without environmental harm, giving you a cleaner solution for both your floors and your trusty robot.
7. Occasional Maintenance for Roomba
Regular maintenance is key in keeping your Roomba in optimum working condition. Always empty the dustbin after each cleaning cycle and clean the brushes regularly. Monitor your Roomba’s battery life and replace when necessary.
Roomba Maintenance Tips:
– Regularly check the cliff sensors and clean them to avoid false detections
– Monitor battery status and replace promptly when needed
8. Expert Advice for Roomba Care in Homes with Pets
In homes with pets, there’s a higher chance of Roomba mishaps. However, you can use certain strategies to reduce these occurrences. For instance, schedule the Roomba to run during the time when your pets are less active and groom your pets regularly to minimize fur on the floor.
Here are some useful expert tips:
– Schedule Roomba cleaning sessions compatible with your pet’s quiet hours
– Invest in regular pet grooming to reduce the shedding
Yes, Roombas are a massive time-saver, but they’re also a responsibility. With these guidelines in mind, cleaning your Roomba, whether due to routine maintenance or unfortunate accidents, should become an easier task. As Roomba’s new partner in crime, remember: protect, disassemble, clean, dry, reassemble, and conduct the final checks! A well-maintained Roomba is an invaluable companion in maintaining a clean, comfortable, and pet-friendly home. It’s time to embrace it!
Key Takeaway: Remember, your Roomba shouldn’t be seen as a nuisance. With these cleaning strategies in your arsenal, you can confidently conquer any cleaning debacle, keep your home clean and fresh, and appreciate the value Roomba brings to your life. Q: How frequently should I clean my Roomba? Q: Can I use any kind of detergent for cleaning the Roomba parts? Q: What to do if there’s a strong residual odor after cleaning? Q: How can I reduce the Roomba’s interactions with my pet? Q: Are there special Roombas for homes with pets? We hope you found this guide helpful! Feel free to share it with others who may also benefit. Browse through our collection of articles for more content on similar topics. Stay clean and stay smart!
FAQs
A: You should regularly conduct minor cleaning tasks such as emptying the dustbin after every run and cleaning the brushes every week. However, you may need a more thorough cleanup in case of accidents like the Roomba running over pet waste.
A: It’s best to use approved detergents or cleaning agents for the Roomba parts. However, for simple cleanup, hot soapy water usually does the trick.
A: If the odor persists, consider replacing the filter or any other part where the smell lingers. Make sure to air-dry all components thoroughly before reassembling.
A: Try to schedule the Roomba’s cleaning cycles during your pet’s quieter periods. Regular grooming can also minimize the amount of pet fur on the floor, which might cause tangles in the Roomba’s brushes.
A: Yes, certain Roomba models are designed especially for houses with pets. They come with high-efficiency filters that can capture fine particles and allergens caused by pets.
