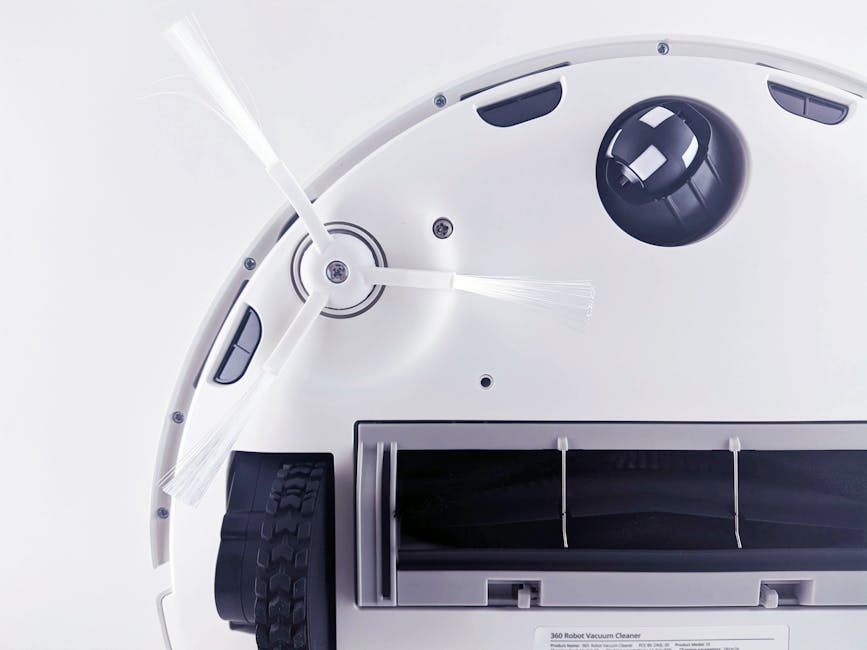
Your Shark vacuum cleaner, like any other device, comprises various components that collectively ensure its successful functioning. The filters, in particular, play a crucial role in maintaining the machine’s effectiveness. Their primary job is to sift through the air that your vacuum sucks in and trap any dust and debris. The air that is then released back into your room is clean and dust-free, making sure you and your family are breathing pure air.
Knowing when to clean or replace these filters is equally critical. A few tell-tale signs could indicate a need for some maintenance. Diminished suction power and a strange, dusty smell are key markers to identify possible filter issues. If you experience these or notice visible debris on the filters, it’s safe to say it’s cleaning time.
Materials Needed for Cleaning Your Shark Vacuum and Filters
Cleaning your Shark vacuum and filters effectively requires a few essential tools. You’d need a soft-bristled brush, warm water, a clean dry cloth, and a mild detergent. If the filters are exceptionally dirty, you might also want to have vinegar on hand, as it works well in dealing with stubborn gunk.
It is recommended to use these cleaning tools carefully. Harsh scrubbing can damage the delicate parts while using cool water might not give you the desired results. It is best to follow the manufacturer’s instructions or refer to reliable sources before beginning the cleaning process.
The Step-by-Step Process of Cleaning a Shark Vacuum
Ready to clean your Shark vacuum? The process is simple but requires careful attention to detail. Start by unplugging the vacuum cleaner and removing its dust cup. Using your soft brush, gently clean off any dust or debris from the cup. After that, you can wash it with warm soapy water. Make sure to dry it thoroughly before reassembling.
However, not all Shark vacuums are designed the same, hence the cleaning methods may vary. Some might need a thorough cleaning after every use, while others may require only a wipe-down. Keeping the manual handy during the cleaning process can help you maintain your particular model better.
Remember not to rush this process. All parts should be properly dried before they are put back together to prevent damage to your vacuum cleaner. After it is dry, assemble the parts in the reverse order you took them apart. This easy-to-follow checklist simplifies the process and ensures a thorough clean-up.
Stay tuned for the next steps as we dive into cleaning the filters, comparisons between washing or replacing filters, and more!
How to Clean Shark Vacuum Filters Properly
Filters are one of the most critical components of your Shark vacuum’s functionality. However, cleaning these is not as daunting as it may initially sound.
To clean the filters, first remove them gently from their housing. Then, rinse them under warm running water until the water runs clear and no visible dust or debris remains. Use your fingers to carefully scrub off any stubborn particles and thoroughly rinse once again. Do not use any cleaning brushes or harsh detergents, as these can damage the filter material.
Once clean, gently shake off any excess water and allow the filters to air dry completely. This could take up to 24 hours, so make sure you’ve scheduled your cleaning day accordingly. Attempting to reassemble the vacuum with damp filters won’t just risk increasing mold or mildew, but it could cause damage to your vacuum cleaner.
In some cases, you might find it easier to toss the old filter and replace it entirely, especially if they’re heavily soiled or damaged. However, this has its own pros and cons:
Pros:
- No hassle of washing or drying
- Ensures optimal suction power
Cons:
- Costlier than washing
- Not an eco-friendly solution
Whatever you decide, remember, regular cleaning of filters ensures optimal performance and a longer lifespan for your Shark vacuum.
Maintaining Your Shark Vacuum for Optimal Longevity
Regular maintenance and proper upkeep of your Shark vacuum can significantly expand its lifespan. Always ensuring that you empty your dust cup after each use will ensure the vacuum remains efficient at all times.
Furthermore, regularly cleaning the vacuum filters is a crucial step. Shark recommends cleaning the foam and felt filters once a month, and the HEPA filter every 12 months. However, these are guidelines and you might need to clean them more frequently depending on your usage.
The best practice is to always keep an eye on your vacuum’s performance. Any reduction in suction power or unfamiliar sounds can signify that it’s time for maintenance.
Remember, these tips and practices are here to guide you. But, adopting them in your routine will help you maintain the performance and longevity of your Shark vacuum, ensuring it continually serves you well for a long time. Get into the habit of regular maintenance and you won’t need to worry about major malfunctions or spending money on replacements.
Key Takeaway:
- A Shark vacuum cleaner’s filters play a crucial role in maintaining its effectiveness and ensuring a dust-free environment.
- The process of cleaning the vacuum includes proper dismantling, careful cleaning with a soft brush, warm water and cloth, and reassembling after thorough drying.
- Cleaning the filters involves gentle washing under warm water, manual removal of stubborn particles, followed by complete air-drying before fitting it back into the vacuum.
- Frequent filter cleaning or replacement is key to ensure optimal performance of the Shark vacuum cleaner.
- Regular maintenance and cleaning of your Shark vacuum cleaner, according to the recommended schedule, can significantly expand its lifespan and keep it running efficiently.
Taking care of your Shark Vacuum and its filters does not have to seem daunting. Regular upkeep and cleaning will ensure its longevity and keep it in great condition. By dedicating time for regular maintenance, you’ll be saving money on unnecessary replacements and reproducing cleaner, healthier air in your home.
Is the Cleaning Process for a Shark Vacuum Similar to That of a Black and Decker Dustbuster?
When comparing the cleaning process for a Shark vacuum and a Black and Decker Dustbuster, both require regular maintenance for optimal performance. To ensure longevity, always remember to clean your dustbuster filters. This simple step helps maintain suction power and prolongs the life of your cleaning device.
FAQs
Q: What can I use to clean my Shark vacuum filters?
A: Warm water alone is enough for regular cleaning of Shark vacuum filters. It’s best to avoid harsh cleaning tools or detergents as they can damage the delicate material of the filters.
Q: How often should I replace the filters in my Shark vacuum cleaner?
A: Generally, the foam and felt filters should be cleaned once a month and the HEPA filter every 12 months. However, replacement depends on the usage and condition of the filters. It’s best to replace them when they are heavily soiled or damaged.
Q: How do I know if my Shark vacuum or its filters need cleaning?
A: Signs of diminished suction power, a dusty smell originating from the vacuum, or visible debris on the filters indicates it’s time for some maintenance.
Q: Can I use vinegar to clean my Shark vacuum filters?
A: Yes, in case of stubborn gunk or dirt, vinegar can be used as it is efficient in dealing with such issues. But remember, too much vinegar or frequent usage can damage the filter material.
Q: Is it necessary to dry the filters completely before placing them back in the vacuum?
A: Yes, it’s critical to let the filters air dry completely before reassembling the vacuum. Reassembling with damp filters could lead to mold, mildew, and potentially damage the vacuum cleaner.
Feel free to share this article with others who might find it helpful. There’s plenty more informative and engaging articles to explore on our website!


