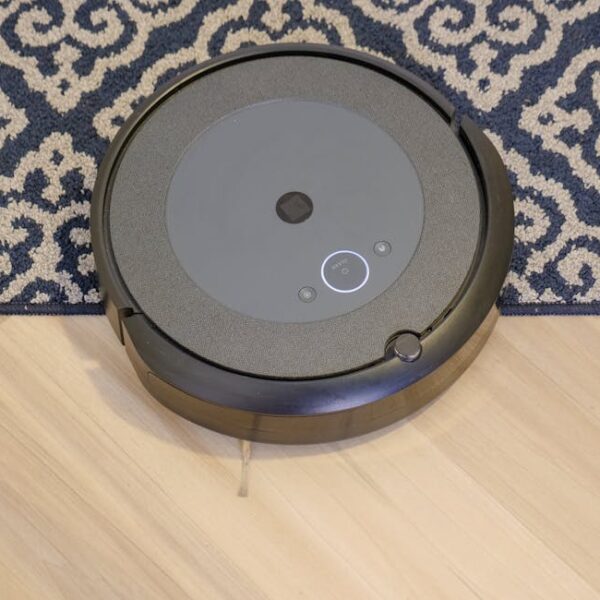
Resetting your Neato Botvac robotic vacuum cleaner is a fundamental procedure that promises to revamp the device’s functionality. Whether you are dealing with a stubborn technical glitch, looking to freshen up its internal memory following an update, or prepping the gadget for a new user, performing a reset could be the quickest route to reinstating its original factory settings.
Understanding the Need to Reset Your Neato Botvac
Sure, your Neato Botvac has been flaunting its exceptional floor cleaning streak. But inevitably, a time comes when you need to do a bit more than just emptying out the dust bin, scrubbing off the brushes or replacing the filters. It’s especially true when it goes rogue, refuses to follow instructions, or worse, malfunctions altogether. This is when a reset becomes the crucial troubleshooting step. It’s like all roads diverging towards this one solution.
However, needing a reset isn’t always indicative of trouble. Even in the absence of malfunctions, a reset might be necessary under certain circumstances. Let’s draw the curtain back to a few common scenarios:
- Post-firmware updates: Once your Botvac’s “brain” has been upgraded, doing a reset helps to start afresh, letting the new software take complete control.
- Changes in home settings: If you’ve recently shuffled your furniture or renovated the house, resetting the Botvac ensures it will perceive these changes accurately.
- Preparing to sell or gift the Botvac: A reset is vital to clear any personal data or preferences stored in the device before passing it on to someone else.
Best Practice: In the case of minor functionality issues or routine checks, it’s okay to attempt a reset on your own. However, for recurring or serious technical glitches, it’s best to seek professional help or get in touch with the Neato Botvac customer support.
Initial Steps Prior to the Neato Botvac Reset
Resetting your Neato Botvac isn’t like pressing a magic button. There are a few preparatory steps to ensure that when you press that reset button, it’ll have the desired effect. You begin by unplugging it, as this guarantees it’s in a safe state during the process. Next, you remove the dust bin which allows you to access some of the buttons required for reset.
Checklist:
- Unplug the device
- Remove the dust bin
Pro Tip: Handle the device gently throughout the process. Rough handling could risk damage to essential components and may lead to additional problems.
Proceeding further, the steps will vary depending on the model of your Neato Botvac. Let’s unravel them separately for each category.
Instructions for Resetting Neato Botvac D Series Models
If you own a D Series model Botvac like the D80, D85, D3, or D5, your reset process involves a sequence of button presses. Specifically, you’ll need to press the ‘Right Bumper’ (the button that detects obstacles in the Botvac’s path) and the ‘Start’ button simultaneously.
Steps:
- Locate the ‘Right Bumper’ and ‘Start’ buttons on your Neato Botvac.
- Hold down both buttons simultaneously for about 10 seconds. You’ll hear a beep indicating the reset.
- Once you hear the beep, release the buttons.
Comparison:
| Pros | Cons |
|---|---|
| Resolves troubleshooting errors | Requires reprogramming post-reset |
| Solves sync issues with connected devices | Familiarity with button locations necessary |
Instructions for Resetting Neato Botvac Connected Series Models
The reset process for Connected Series models like the Neato Botvac Connected, D3 Connected, D4 Connected, D5 Connected, D6 Connected, and D7 Connected is a little different. These models are equipped with a ‘Home’ button that’s vital to the reset procedure.
Steps:
- Hold down the ‘Home’ button on your Neato Botvac for about 15 seconds.
- Release the button when the robot’s lights blink.
- The Botvac is now reset and ready for a fresh start.
Best Practice: Ensure your Botvac’s battery is fully charged before starting the reset process.
Connected vs Non-Connected Models:
The Connected Series models sync with your smart home devices, such as your smartphone or your Wi-Fi network. Thus, resetting them could impact these integrations. Post-reset, you’ll need to set up these connections once again.
Post-Reset Procedures and Troubleshooting for Neato Botvac
Now that your Botvac is good as new, it’s crucial to follow through with some post-reset procedures. These will help the device run optimally and adapt to its freshly reset state. This includes reprogramming the robot, setting up any connected integrations, and performing a test run to troubleshoot any lingering issues.
Checklist:
- Reprogram the Botvac, including scheduling settings.
- Reconnect the device to your Wi-Fi network.
- Resync any smart home devices.
- Perform a test run to ensure proper functioning.
Pro Tip: Always keep your Botvac’s firmware updated to the latest version to ensure the best performance and latest features. Moreover, regular maintenance like cleaning the brushes and filters will help prolong the device’s lifespan and maintain its efficiency post-reset.
Key Takeaway:
- A reset on Neato Botvac devices can help fix common technical issues, adjust to new home settings, or prep the device to be sold or gifted. It is a measure to reinstating its original factory settings.
- Before performing a reset, certain steps like unplugging the device and removing the dust bin are necessary.
- The reset procedure varies based on the model of the Neato Botvac. For the D series models, the reset involves pressing the ‘Right Bumper’ and ‘Start’ button simultaneously, while for the Connected Series models, the ‘Home’ Button needs to be pressed.
- After a successful reset, it is important to reconfigure the Botvac, including its scheduled settings. Also, in the case of connected models, it would be necessary to reconnect the device to any synced smart home devices.
Keep in mind that while resets can be often performed by the user themselves for minor issues, a recurring or serious technical glitch should always be checked with professional help or Neato Botvac customer support. Remember, taking care of your gadget doesn’t just mean regular cleaning but also includes taking these reset measures when necessary to ensure its optimal functionality.
Can the Reset Process for Neato Botvac Help in Troubleshooting Shark Robot Issues?
When facing issues with a Shark robot vacuum, utilizing the effective steps to reset your shark robot vacuum can often resolve common problems. This process can clear minor glitches and restore functionality, similar to the reset process for Neato Botvac. Proper resets ensure optimal performance for your cleaning devices.
FAQs
Q: What should I do if the reset process does not solve my Neato Botvac’s technical issues?
A: If a reset does not resolve the issues, it is advised to seek professional help or contact Neato Botvac’s customer support for assistance.
Q: I own multiple Neato Botvac models, do I need to follow the same reset process for all?
A: No, the reset process varies depending on the Botvac model. Always refer to the specific instructions for your model.
Q: How often should I reset my Neato Botvac?
A: There’s no set timeframe for resets, it’s done as needed. Common reasons include technical issues, post-firmware updates or changes in home settings.
Q: I’m planning to sell my Neato Botvac, is reset necessary?
A: Yes, it’s crucial to reset your Botvac before selling or gifting it to clear any personal data or preference settings stored in the device.
Q: Why is my Neato Botvac not working correctly after the reset?
A: Make sure you follow the post-reset reconfiguration steps properly, including reconnecting to the Wi-Fi network and syncing any smart home devices. If problems persist, contact Neato Botvac’s customer support.
We hope you found this guide helpful! Please feel free to share it with others who might find it useful too and don’t hesitate to explore more of our posts to gain a better understanding of your gadgets.
