If you’ve accidentally sucked up some water with your vacuum cleaner, you know the resulting panic that can set in. Understanding why this is dangerous can ease some of your concerns and help guide your actions.
At its core, a vacuum cleaner is pretty straightforward: it sucks up debris from your floors and deposits it in a bag or canister. But beneath this simplistic operation lies complex electrical components that power the suction mechanism. These circuits, wires, and mechanical parts are sensitive, and their exposure to water can lead to a range of issues:
- Short-circuiting: Water conducts electricity, and if your vacuum cleaner’s inner functionings get wet, it could lead to a short circuit–a rapid and potentially fatal (for your vacuum) surge of electricity.
- Corrosion: Water on metal and electricity-induced heat can lead to corrosion of your vacuum cleaner’s mechanical parts, reducing its lifespan.
- Mold growth: If a vacuum cleaner is not dried properly after water exposure, it could breed mold and bacteria, becoming a health hazard.
First Aid Measures: Steps to Take Immediately After Water Enters the Vacuum
Even if the worst happens and water enters your vacuum cleaner, don’t panic. Here’s what you should do immediately:
- Turn off the machine.
- Carefully unplug the vacuum cleaner from the power source, avoiding direct contact with water.
Safety is paramount here. Electricity and water can create a dangerous mix. Please, don’t attempt to handle the vacuum if you suspect it’s malfunctioning due to water damage; instead, consider seeking professional help.
Cleaning and Drying the Vacuum Cleaner
Assuming the situation is under control and safe, you can then proceed to clean and dry the vacuum cleaner. Here’s a step-by-step guide:
- Dismantle the vacuum: Most vacuums have a removable bag or canister, as well as detachable hose. Taking apart these components will help air circulate and speed up drying.
- Dry thoroughly: Use a towel to wipe down the parts, then leave them to air dry in a warm place. Ensuring a thorough dry is crucial to prevent mold growth.
- Clean carefully: Certain parts of your vacuum, especially the brush roll, can be cleaned with mildly soapy water. Rinse these parts and dry them thoroughly before putting your vacuum back together.
Keep in mind, not all vacuums can be cleaned in the same way. Always refer to the user manual for specific instructions, and if you’re in doubt, consult a professional.
Best Practices: Avoiding Water Damage During Cleaning
To protect your vacuum cleaner from untimely water damage during cleaning, consider following these best practices:
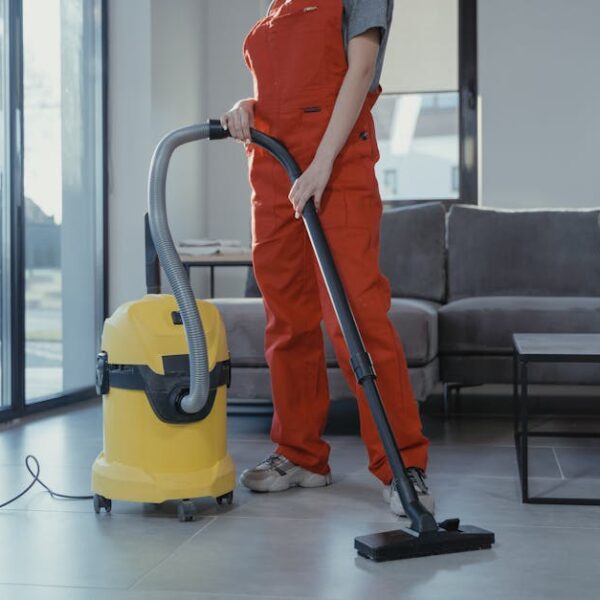
- Do not use the vacuum on wet or damp surfaces: Vacuum cleaners are not meant for water suction unless specified as a wet-dry vacuum cleaner. Stick to dry cleaning to avoid mishaps.
- Do not wash the vacuum with water: As indicated earlier, not all parts of a vacuum cleaner can be cleaned with water. Those that can be washed require careful rinsing and thorough drying.
- Ensure your vacuum cleaner is stored in a dry place: Humidity and moisture can lead to slow damage to the vacuum cleaner’s inner workings, reducing its efficiency over time. Always store your vacuum cleaner in a dry, well-ventilated space when it’s not in use.
Repair or Replace? Evaluating the Damage
If you discover that your vacuum cleaner is not functioning properly post-water exposure, the decision to repair or replace can be a tough one. Here are some key factors to consider:
- Assess the extent of the damage: If your vacuum cleaner is totally dead post-water exposure, there’s a chance that the motor is fried, and replacement might be a wiser option.
- Weigh the cost of repair versus replacement: The cost of repairing a heavily damaged unit might be close to or even surpass purchasing a new one.
Here’s a pros and cons list to consider:
| Repair | Replace | |
|---|---|---|
| Pros | Economically friendly, continues to use existing unit | A new vacuum ensures a longer lifespan, latest features |
| Cons | Could potentially fail again, not all parts may be replaceable | May be cost-prohibitive, recycling or disposing of old unit |
How to Prevent Water Damage in the Future
An old saying goes, Prevention is better than cure. Here’s how you can prevent water from damaging your vacuum cleaner in the future:
- Do not vacuum wet or damp areas unless using a wet-dry vacuum cleaner.
- Do not rinse or fully wash your vacuum cleaner with water. If you need to clean your vacuum, use a damp cloth for the exterior and dry cloth for the interior parts.
- Store your vacuum cleaner in a dry place. Moist environments can lead to slowly developing damage over time.
Pro tip: If you find yourself often cleaning spillages or damp areas, consider investing in a wet and dry vacuum cleaner. These units are specifically designed to handle both dry dirt and liquid messes, giving you versatility and peace of mind.
Key Takeaway:
- Water exposure to vacuum cleaners can lead to a variety of issues ranging from short circuits and corrosion of metal parts to mold growth due to moisture.
- Immediate action should be taken after water exposure, including turning off and unplugging the vacuum cleaner and not touching it without proper safety gear. If needed, professional help should be sought.
- Cleaning and drying the vacuum cleaner can be done by dismantling it and applying a methodical cleaning process.
- Deciding whether to repair or replace a water-damaged vacuum cleaner involves factors such as the extent of damage, comparison between repair and replacement costs, and the future performance of the vacuum.
- Future water damage to vacuum cleaners can be prevented through practices such as not vacuuming wet or damp areas, not washing the vacuum cleaner with water, and storing the vacuum cleaner in a dry place.
You’re now armed with the knowledge to handle and prevent water damage to your vacuum cleaner. Remember, safety is always paramount, and professional advice can save you time and additional costs when in doubt. Don’t let a momentary slip dampen the longevity and functionality of your trusty cleaning companion.
What Should You Do If Water Gets Into Your Vacuum Cleaner After Steam Cleaning Vinyl Floors?
If water gets into your vacuum cleaner after steam cleaning vinyl floors, immediately turn off the device and disconnect it from the power source. Allow it to dry completely before attempting to use it again. While waiting, consider exploring floor cleaning alternatives to maintain your vinyl floors without risking damage.
FAQs
Q: Can all types of vacuum cleaners handle water and damp surfaces?
A: No, not all vacuum cleaners are designed to handle water. Only specific models, referred to as wet-dry vacuum cleaners, can safely tackle both dry dirt and liquid messes.
Q: Can vacuuming a slightly damp carpet damage my vacuum cleaner?
A: Yes, even a slightly damp carpet can damage your vacuum cleaner. Using a standard vacuum cleaner on damp or wet surfaces can expose the inner workings to moisture, leading to various issues like short-circuiting and corrosion.
Q: Is it possible to wash my vacuum cleaner to clean it?
A: No, washing your vacuum cleaner with water can cause damage. Rather, use a damp cloth for cleaning the exterior and a dry one for the interior parts.
Q: What type of professional should I seek if my vacuum cleaner gets wet and stops working?
A: If a vacuum cleaner gets wet and stops functioning properly, you should consult with a professional who specializes in appliance repair, particularly someone with experience in fixing vacuum cleaners.
Q: How long should I wait before turning on my vacuum cleaner after it got wet?
A: After making sure all parts of the vacuum cleaner are completely dry, it’s advisable to wait at least 24 hours before plugging in and using your vacuum cleaner again. This assures that all moisture is evaporated, reducing the risk of damage to the unit.
Share this article with anyone who may find it useful and explore our other posts for more home maintenance tips and advice!

